Initialization
This guide demonstrates how to initialize, authenticate, and connect to a demo conference using Visual Scripting. The demo conference has several bots injecting audio, making it easier to test the connection and project setup during the prototyping phase.
To start fresh, you can create a new project from the Unity Hub. This guide uses the Third Person template in Unity version 2021.3.6f1 LTS.
Set up up the DolbyIO Manager
The Unity plugin provides access to an instance of the SDK through a custom DolbyIO Manager manager.
To add the SDK to Unity, follow these steps:
Create an empty game object in your scene and provide a name for the object. In this example, we call the object
AppManager:Select the created game object and select
Component>DolbyIO>DolbyIO Managerfrom the Unity menu. This step adds theDolbyIO Managerto the game object.
Set up the initial visual scripting
Select the
AppManagerobject and add aScript Machineby choosingComponent>Visual Scripting>Script Machinefrom the Unity menu.Add a new script to the
Script Machinecomponent. In the component, click theNewbutton and name and save your new script. Start editing the script with theEdit Graphbutton. The newly created script graph containsOn Start, which is the initial triggering event. This event must be explicitly set asCoroutinein order for it to work with theInitializenode. Select the node and turn on theCoroutinecheck box.Right-clicking on the script background and add these new nodes to the script:
Dolby IO>InitializeDolby IO>Demo ConferenceString Literal, which can be found from a search in the new node window- For a more convenient method, add the Get Token node. See below for more details.
Add these connections:
- Connect the
On Startevent to the input trigger of theInitializenode - Connect the output of the
Stringnode to theAccess Tokeninput of theInitializenode - Connect the
Initializeevent to the input trigger of theDemo Conferencenode - Set
Spatial Audio StyletoSharedto use shared scene.
- Connect the
Set up the Client Access Token
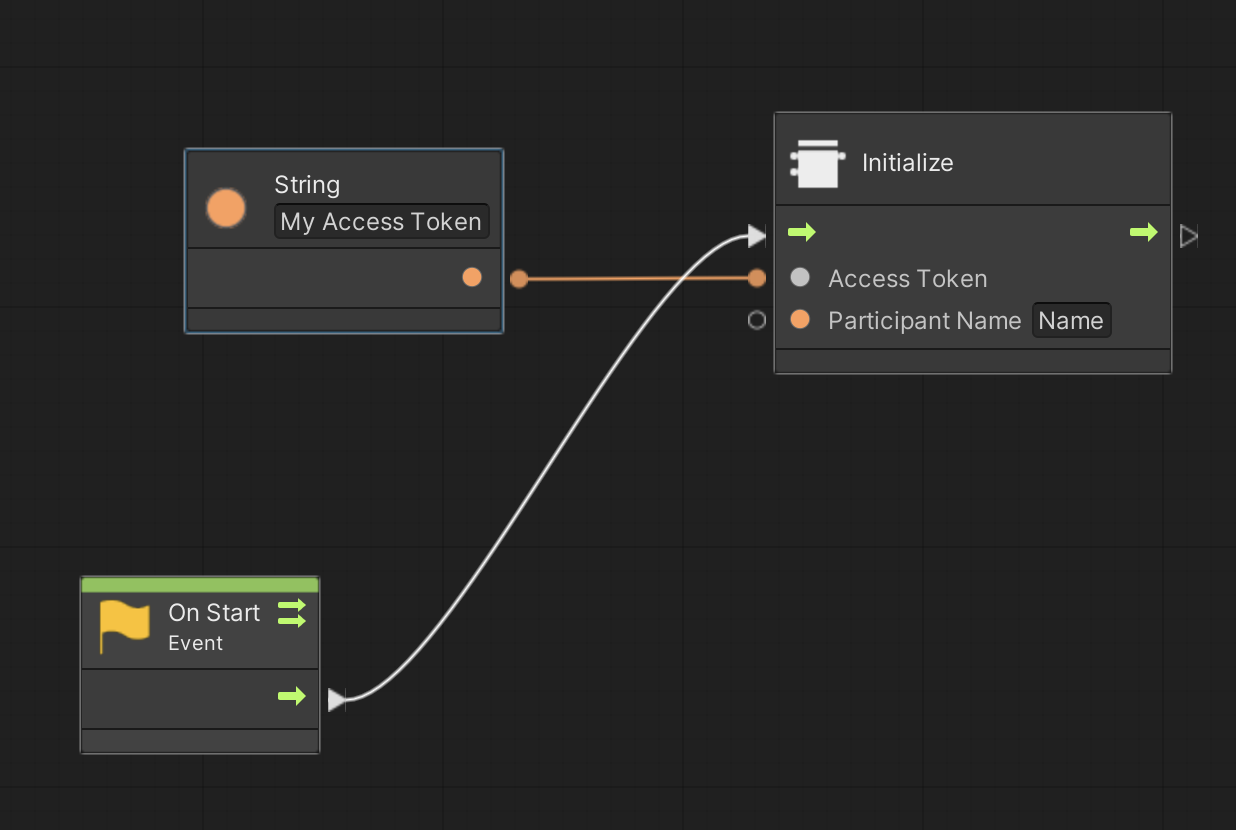
You should have signed up in Dolby.io by now. In the app that is automatically created for you in the Dolby.io dashboard, acquire a temporary Client Access Token and paste it into the String literal node. For security reasons, the token you acquired expires after 12 hours. You will have to provide a new token after the expiration.
The following visual scripting example illustrates how to connect the nodes together once you acquired a Client Access Token from the dashboard.
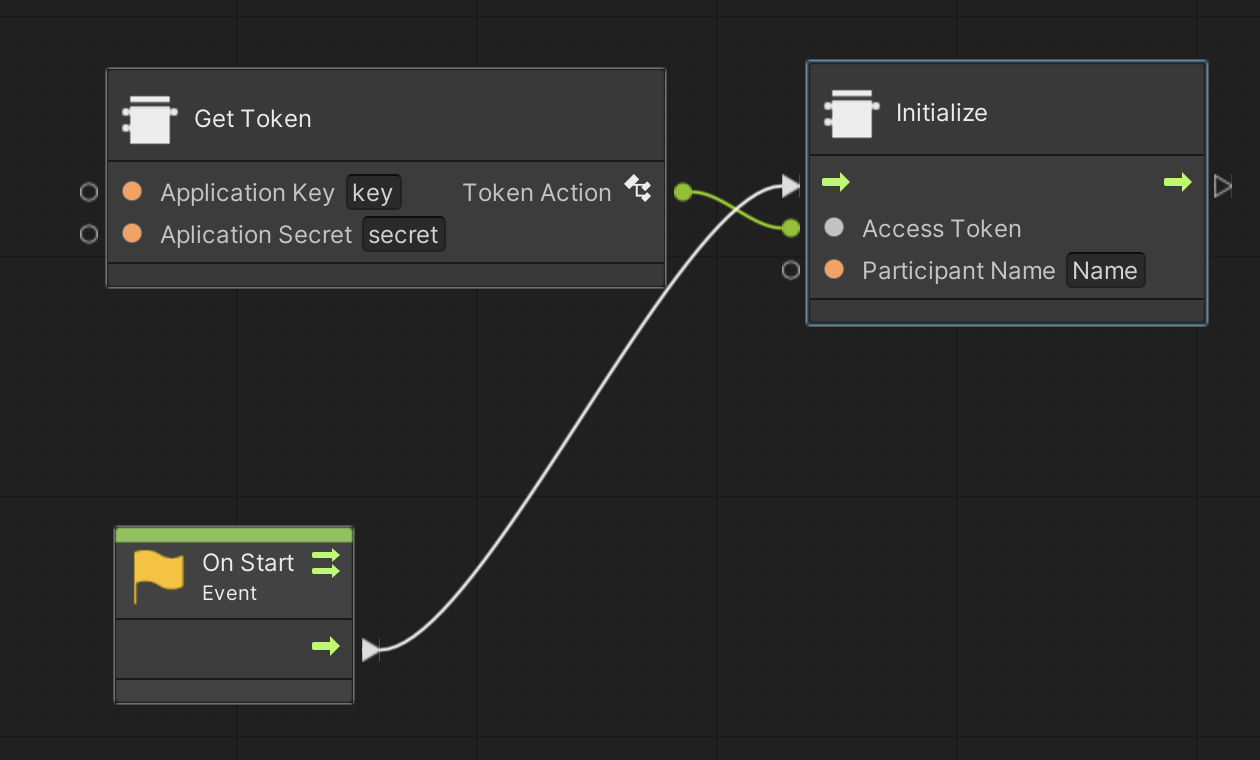
Alternatively, you can add the Get Token node to the graph, and pass the App Key and App Secret to the node. Connecting the output of the node to the Access Token input of the Initialize node will generate a client access token from the Unity app and initialize the plugin.
⚠️ Please note that using
Get Tokeneffectively includes the permanent app credential in your Unity app, which is not safe for production deployment. Please follow our security best practices and set up a backend server to retrieve a temporary access token on behalf of the Unity app.
The following visual scripting example illustrates how to connect the nodes together if you decided to use the Get Token node:
Once this is all done, run the app. If everything works, you should be able to hear the audio coming from the Dolby.io service, which confirms you have properly configured the development environment with the Unity plugin installed and are ready to go.